
There are many advantages to making a simple checklist with Talexio HR and payroll software. So it is worth investing some time in creating and refining your checklist
- Your staff will perform HR and payroll actions better and faster.
- You can automate routine tasks.
- Checklists save willpower, which is known to be limited.
When it comes to managing HR administrative and operational tasks, Talexio’s checklist feature helps make life easier for HR. Checklists can be used effectively to manage the onboarding of new employees when they join your company and also the offboarding when an employee leaves the company. By creating customised onboarding and offboarding templates, Talexio allows you to automate these 2 important HR processes that directly involve the supervisor, HR and employees. Apart from onboarding and offboarding processes, as the checklists can be customised, you can also use them to manage other HR ad hoc processes such as work permits. Here is how to create a checklist with Talexio HR software.
Step 1. Create a checklist to organise any HR process, including work permits, onboarding and offboarding
The most useful checklists are created automatically as part of the onboarding or offboarding processes – when you are creating an employee Talexio will ask you if you would like to kickoff a checklist based on a template.
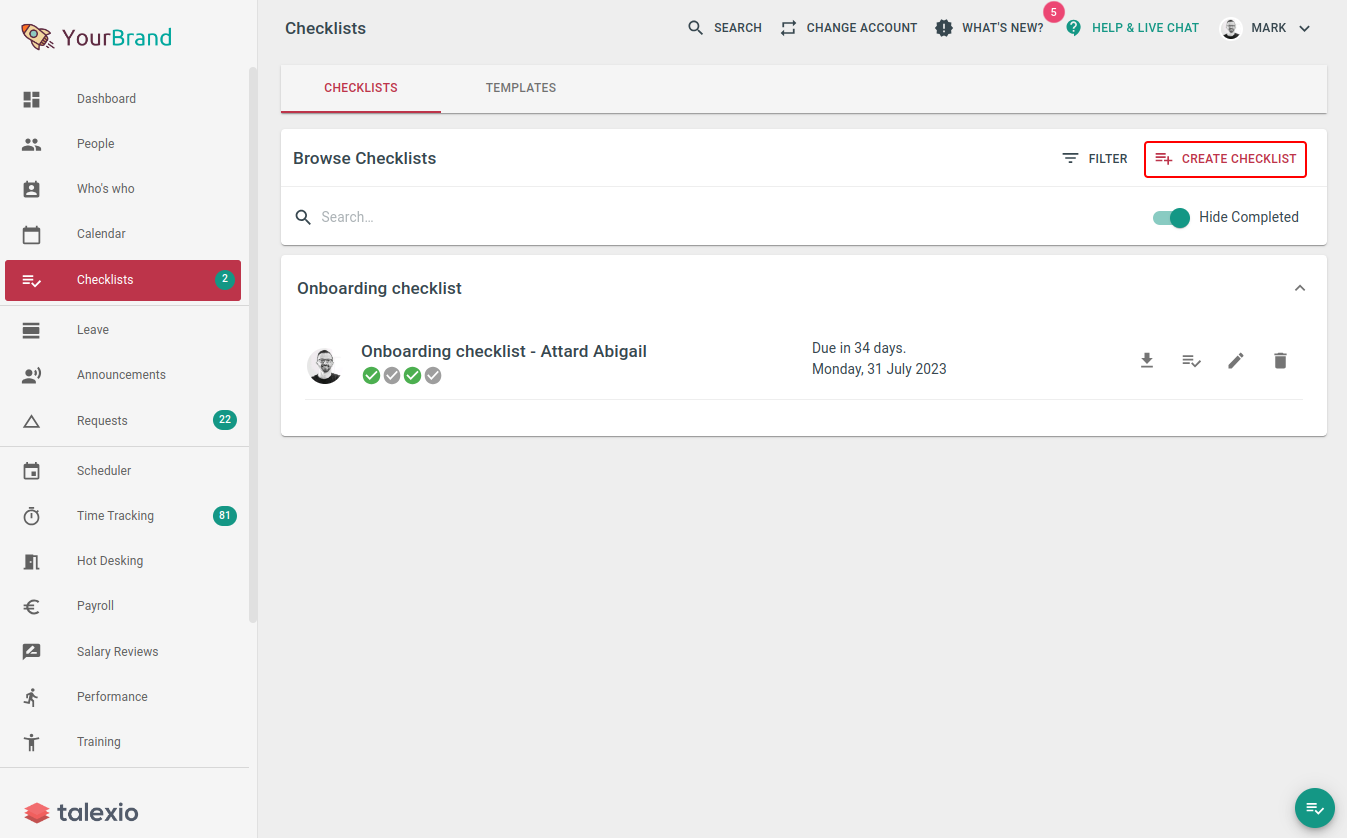
Alternatively you can also create ad-hoc checklists manually. To do so, you can go directly to the Checklist section and click the “Create checklist” button on the screen’s upper left-hand side.
Step 2. Customise your checklists or use templates for your standard HR processes
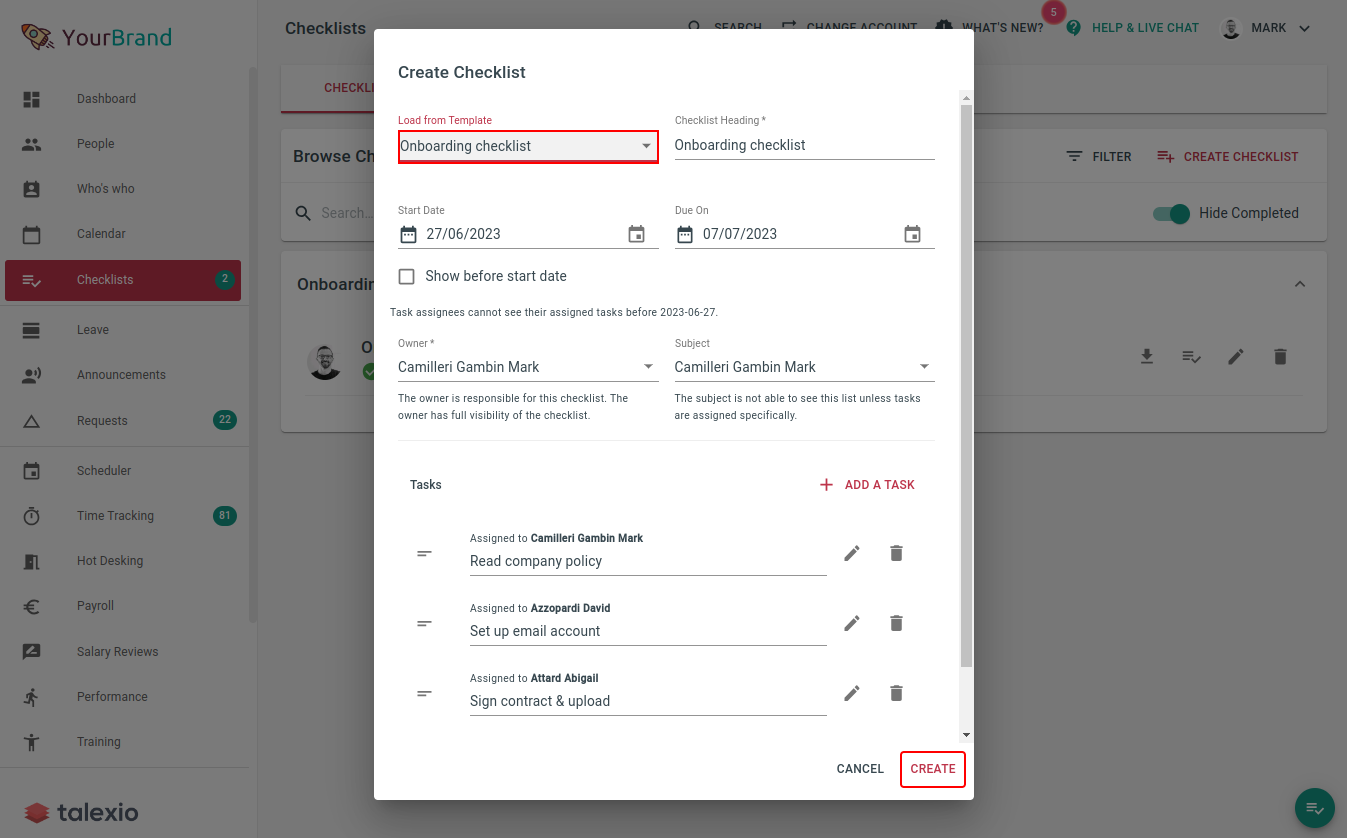
Enter the details for your Talexio HR software checklist, such as:
- Loading a preset template – this will pre-populate your checklist for you.
- You can also add a heading/name to the checklist.
- Adding a date from which the checklist should start.
- Adding a due date (i.e. the date by which the assigned tasks must be completed).
- Owner: the person who is responsible for the checklist. This can be you or another staff member to whom you assign the responsibility over the process.
- Subject: the person about whom the entire checklist is related to. Any data uploaded from the checklist would be related to this employee. This is an optional field. While some tasks may be assigned to the subject, it does not mean that all tasks are to be completed by the subject.
- Tasks: Here, you can add the things you want to include as part of the process.
Step 3. Ensure things run efficiently with due dates, automatic reminders and additional information
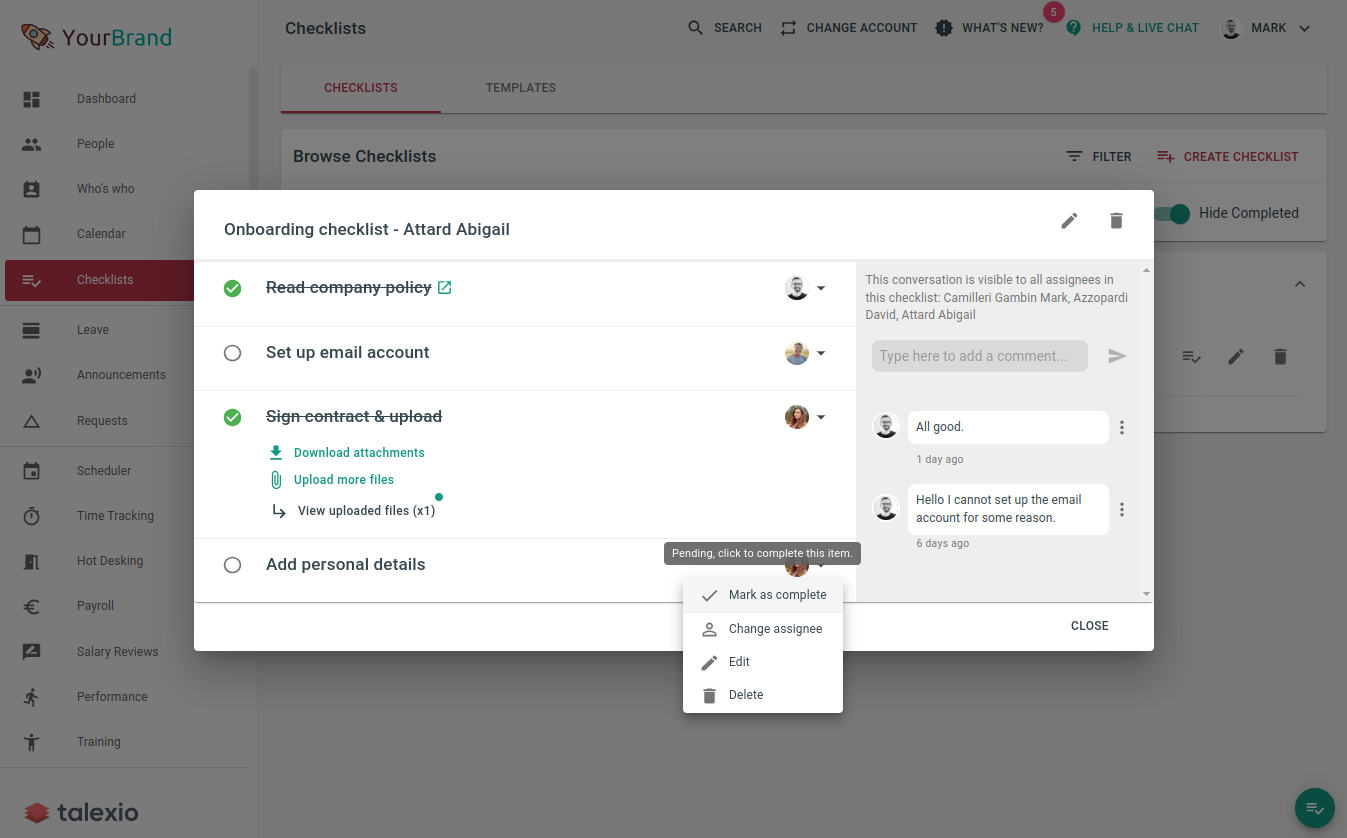
Each task in the checklist can have more information – if you click on the Edit button, more options will appear, such as:
- Manually specify a different assignee to the task – subject and owner are also available.
- Insert an optional description of the task.
- Insert links to a website the assignee should visit (e.g. a link to a survey that needs to be completed) or even upload a file for the assignee to read
- Select Upload required: this means that the assignee must upload a document before they can complete the checklist. Once the assignee receives the checklist, they will see a paperclip icon indicating that they must upload something.
After uploading, the icon changes to indicate that an upload has taken place. You can then:
- Pre-select the data category for the desired upload: For example, if the recipient needs to upload a copy of the ID card, you can select the Employment category.
- Optionally save in the subject’s employee documents: This will save the upload into the subject’s employee documents section
- Attach elements: Here, the creator of the checklist can upload all documents that the recipient can access in the checklist.
- Once you have added all the requirements to your checklist, click on the Save button.
Voilà! You have successfully created your first checklist.

Step 4. Save your HR checklist and monitor progress
Once your HR checklist is created, each assignee will get an email with the checklist and the due date. Your people will then work through the checklist.
If a due date has been set, the recipient of the checklist will receive an email notification informing them if certain tasks have not been completed one day before the due date.
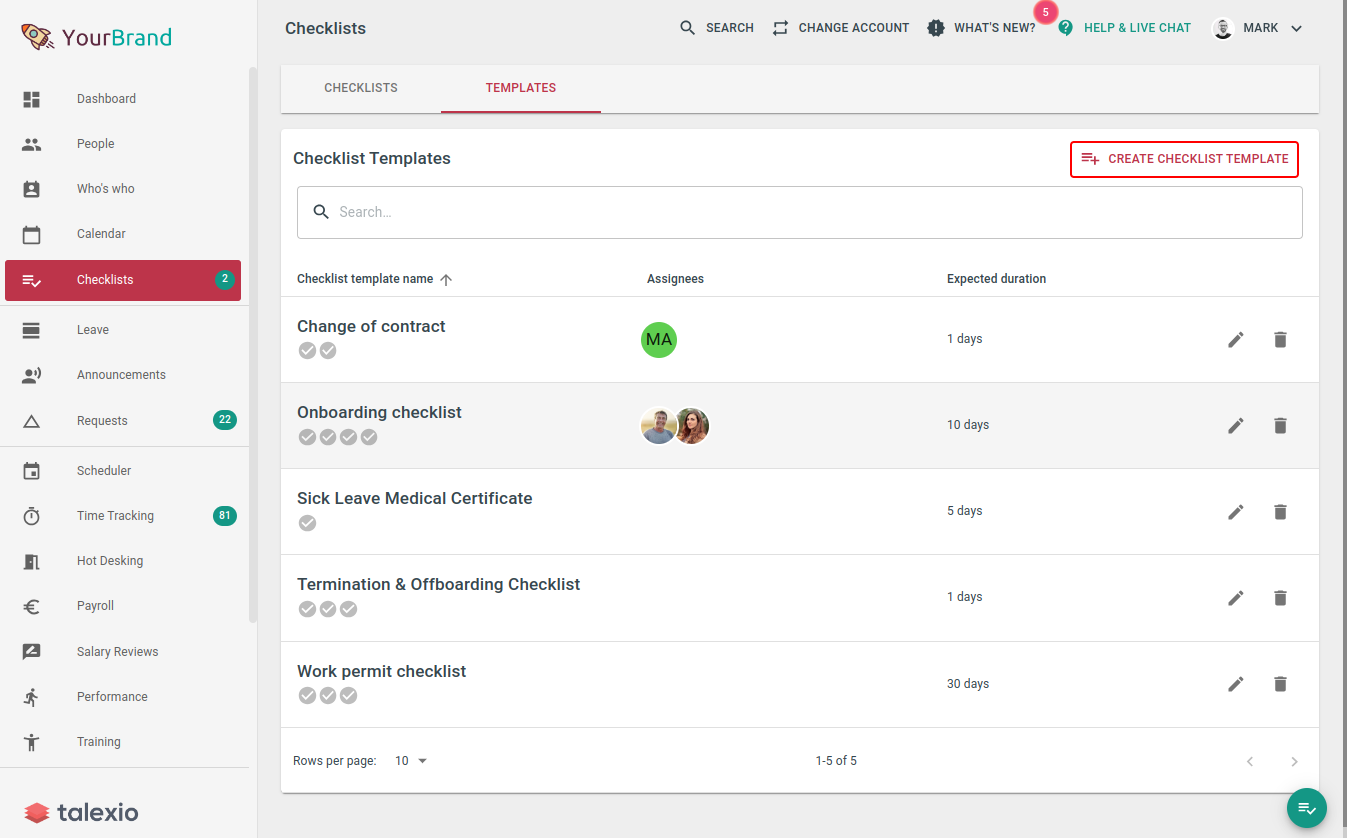
From the templates tab, you can create as many checklist templates as you need. These will help automate your various processes. If you want to know more about customisable options, read our article.
Our Final Thoughts on Talexio HR Software Checklists
All in all, a checklist can become an excellent tool in your personal and professional life to help you complete routine tasks more easily and reduce the likelihood of making mistakes. Try creating a checklist with Talexio to cover all your HR needs, and you will see how much your efficiency improves.
Talexio HR Software Checklist FAQ
It is an electronic checklist that you can use within Talexio HR software to speed up HR and payroll procedures.
With the help of customised onboarding and offboarding templates, you can automate important HR processes that directly involve the supervisor, HR and employees.
Contact our support department, and we will provide you with the best payroll and HR solutions to suit your business needs.